In Part 2 of All that we Know on Add-ons (part 1 is here), we talked about how to create add-ons that include a simple child relationship. The sole purpose of that add-on was to add a child table and have it automatically relate to the context of the layout in which we drop the UI elements. This simple relationship might prove useful in many cases: add a notes or addresses table easily. But for complex relationships, we need to create filemaker add-ons with join relationships.
To keep our heads straight, pictures and a real-world scenario (or at least a common join-table use case) will help us understand this. We’ll use a Schedule table that shows all the classes in which each student is enrolled.
Considerations
Here’s a small list of considerations about FileMaker add-ons with join relationships
- Just like in our discussion about add-ons with relationships (part 2), we’re creating this add-on from the related table context. That means, in this case, we’ll be creating it from the join table perspective. The base table of the add-on layout is “Schedule”.
- Each table has their proper keys. The Schedule (or join table) contains a generic foreign key field (as described in part 2), and it contains the foreign key for the far right table (the Classes table). And of course, the tables contain primary key fields. The default fields feature of FileMaker 19 will create the primary key fields for you.
- A package is one or more tables (among other FileMaker things). As you install the add-on, the tables inside the package get added to the schema once. Even if you place the add-on many times in your file, each instance will use the exact same table.
- An add-on must also include the far right table. In this case, the add-on contains the Classes table. There’s no need to create the relationship between Schedule and Classes. It’ll be automatically created on install.
- Adding an add-on to a layout automatically creates the relationships between that layout’s table occurrence and the add-on’s tables, provided you’ve set up the package correctly.
- Remember: there’s a difference between ‘installing’ the add-on and dragging it to your layout. The difference is very apparent in these kinds of add-ons.
Creating Join Related Packages
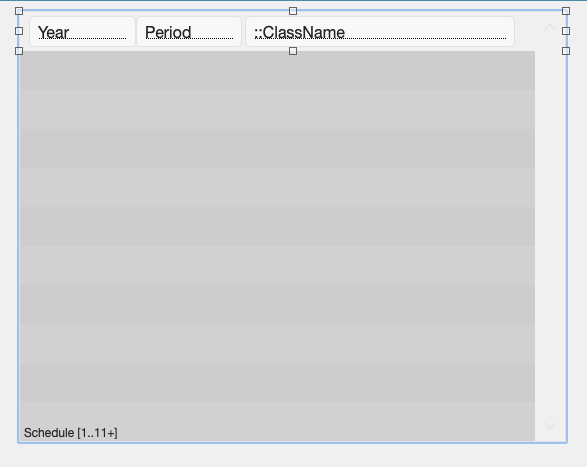
Our first step is to set up the portal showing the schedule records. Again, since we’re on the context of the schedule, use the “Show Records from Current Table” option of the portal set up.
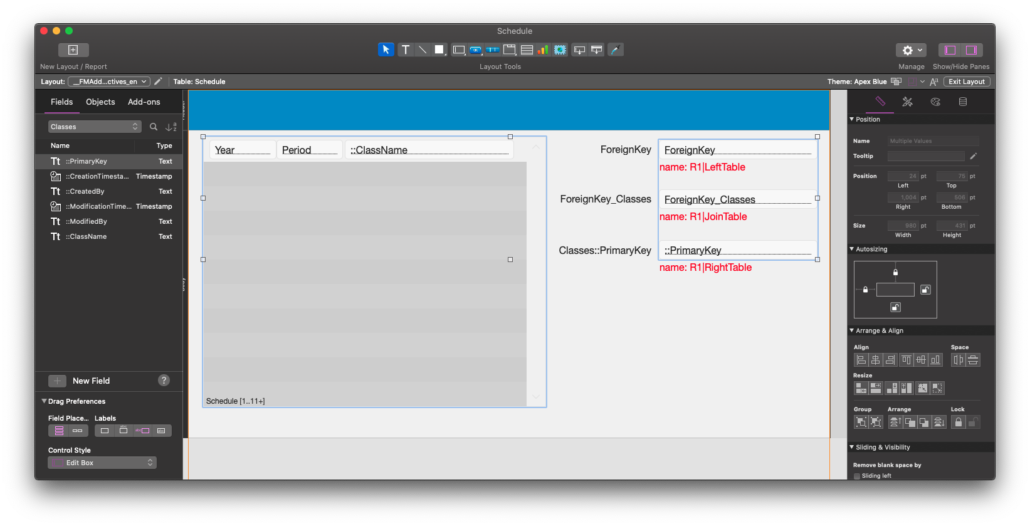
As we can do with all other portals, we can put any fields from the context or relationship inside the portal. Notice in the image, I have “Classes::ClassName” field in the portal. That’s fine. Yes, it’s an unrelated field since we didn’t create the relationship, but you can still place the field on the layout.
Group this object.

Next, we need to tell the add-on package which fields is the primary key and which fields are the foreign key fields. Place those fields on the same layout and name them as follows:
Schedule::ForeignKey: R1|LeftTable This is the field that will be part of the relationship to the context upon which the add-on is dropped.
Schedule::ForeignKey_Classes: R1|JoinTable: The foreign key meant for the relationship to the Right table (in this case, the Classes table).
Classes::PrimaryKey: R1|RightTable. This is the primary key of the Classes table (yes, it’s okay if you put the unrelated field on the table).
NOTE: The name is important in its structure. Each field name needs three pieces:
- A relationship name: this can be anything as long as it’s the same for all three fields.
- A “|” (pipe character)
- and one of three names: “LeftTable”, “RightTable”, “JoinTable”
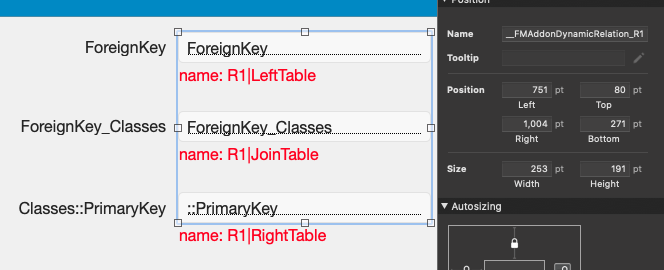
Now group just the fields together and name the group
__FMAddonDynamicRelation_
and complete the name with the relationship name you used in the field names. My example would be:
__FMAddonDynamicRelation_R1
At the end of the set-up, this is what you have on the add-on creation layout.
At this point, I have a perfectly-set up layout. I can now create an add-on using the same process I’ve described before. Simple. Those two grouped items will be part of the package. Finally, on the install . . . let’s see what happens.
Installing
As we do with other add-ons, we can install this join-relationship add-on. Additionally, the install process adds to the file the package tables, fields, scripts, and layouts. In this case, the Classes and Schedule tables are installed.
Further, when you drag the add-on onto a layout, you only get the grouped objects. The group of fields is NOT part of what you drag on. Instead they’re indicators to FileMaker of the relationships to create.
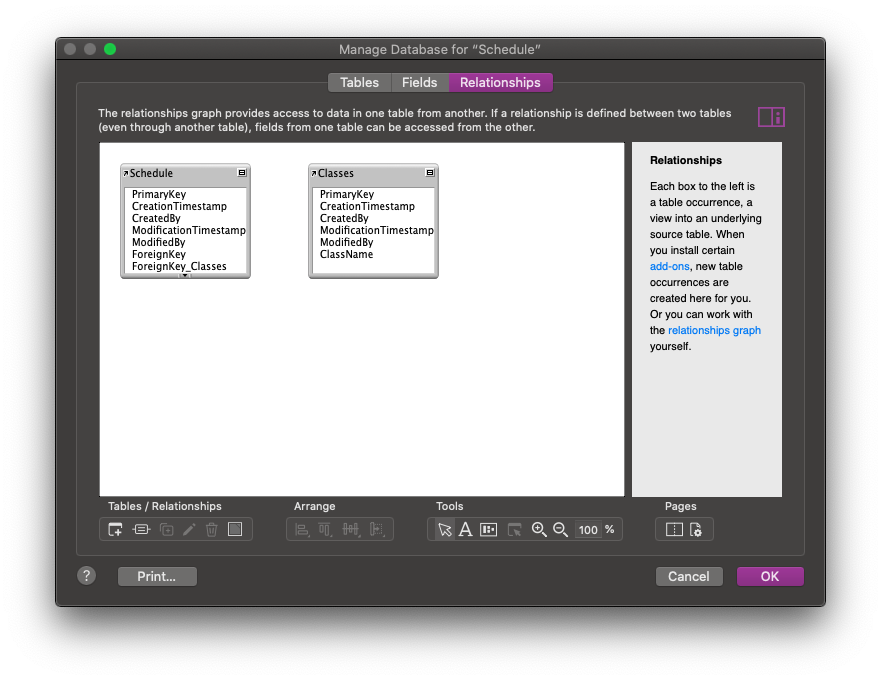
Here’s what the Manage Database looks like when you install the add-on.
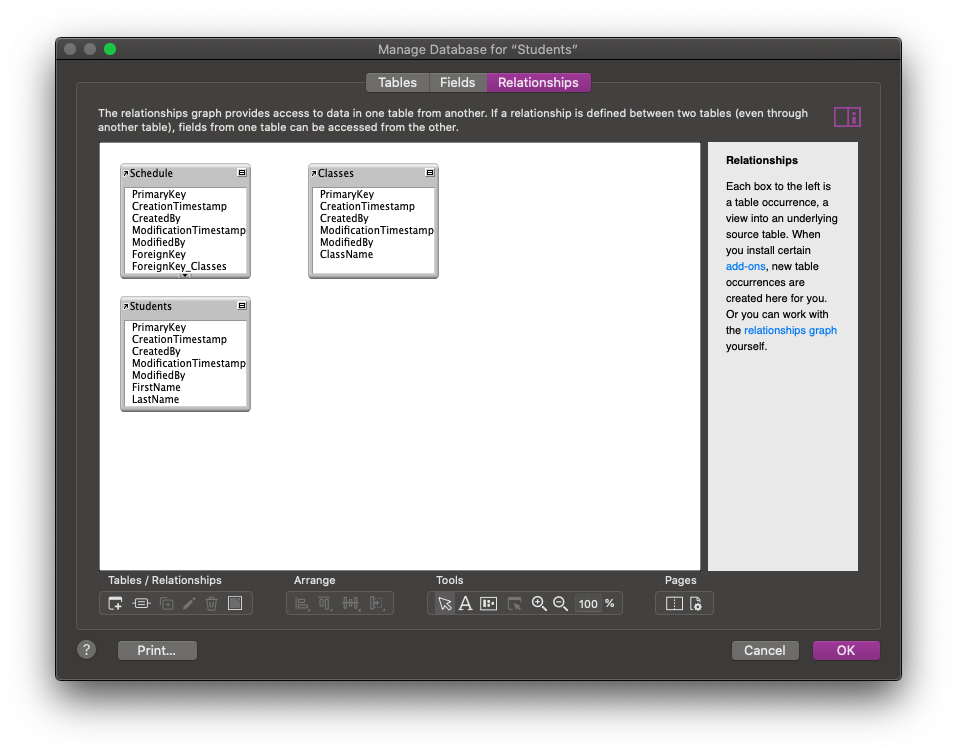
And here’s what it looks like when I drag the add-on onto a Student layout.

After all this is done, we have a join-table relationship installed into the app. The process takes a few moments to set up correctly, but once done, the process adds a lot of good functionality to these add-ons.