In part 1 of All That We Know on Add-ons, explaining all that we know about this new feature, we talked about how to create add-ons that lend themselves to UI widgets. Calendars, check box button bars, notification popovers, date pickers, timers, etc. all can be dropped into a custom app as they are. Sure you might need to attach some fields to scripts, but essentially these kinds of widgets are a complete package.
There are other types of add-ons that require a more extensive relational set up. That is, you might wish to build an add-on called “Notes” that consists of a related table of notes displayed in a portal. This add-on is meant to be installed anywhere in your file and in many different files. This add-on takes the place of having to build this table, the scripts, and the relationships over and over. Build it once. Package this as an add-on, and boom. Use the add-on many times.
In this post we’ll look at how to create this “Notes” add-on package, which, in database terms, requires a one-to-many relationship. We’ll also explain how to create a many-to-many relationship add-on, such as a “Schedule/ Classes” package.
Considerations
- We are creating add-ons from the ‘related table’ context. Since, in this post, we’re using the use case of “adding a notes package to a custom app”, our add-on creation starts with the Notes context (table).
- A package is one or more tables (among other FileMaker things). As you install the add-on, the tables inside the package get added to the schema once. Even if you place the add-on many times in your file, each instance will use the exact same table.
- Adding an add-on to a layout automatically creates the relationships between that layout’s table occurrence and the add-on’s tables, provided you’ve set up the package correctly.
- Remember: there’s a difference between ‘installing’ the add-on and dragging it to your layout. The difference is very apparent in these kinds of add-ons.
Yes. I know these points are a bit confusing. We’ll clarify them in due time, but I wanted to point these ‘issues’ out to you right away. I’d recommend reading the three considerations again and see if you get an idea of their meaning.
So let’s get packaging!
Creating Related Packages
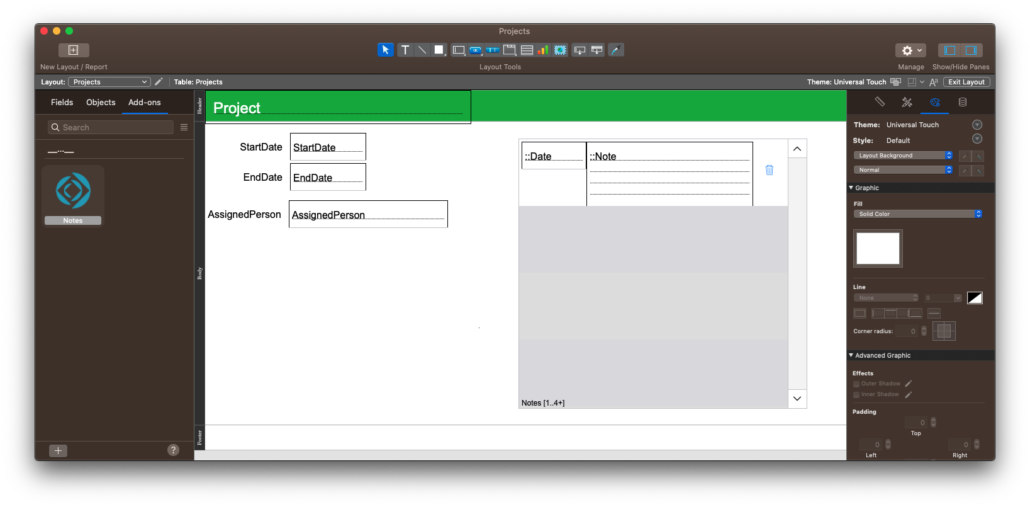
A Related package is one that will be added to a custom app and be automatically related to some other table in your file. Again, our example is “Notes”. We’re going to illustrate this process with a child table that holds notes for each project in a Project table. This is our end goal:
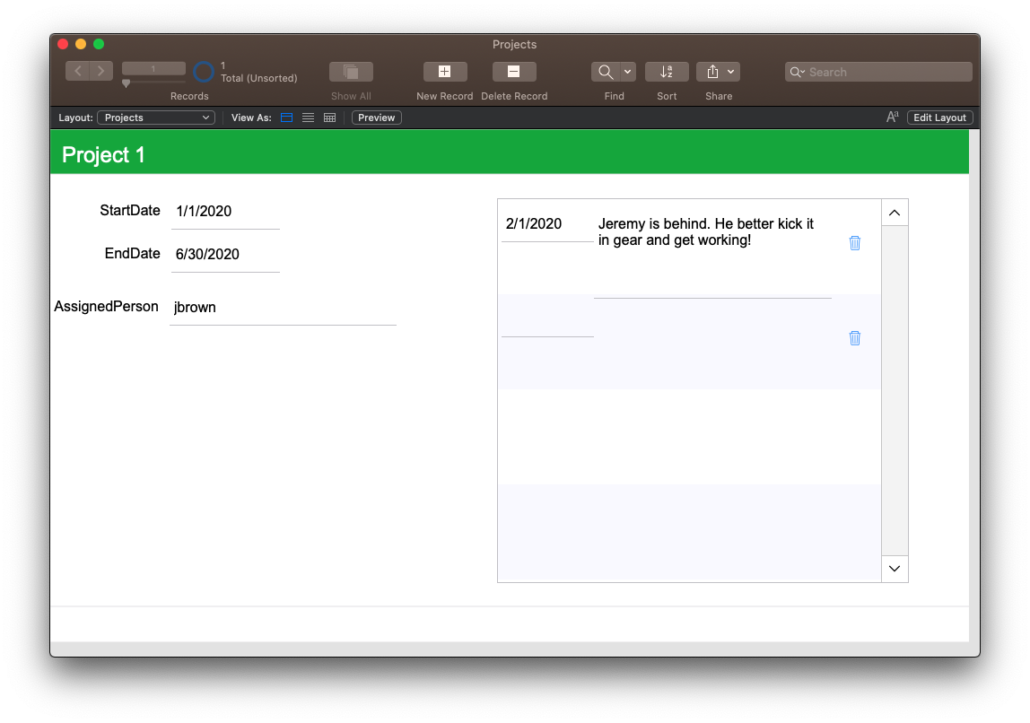
In a new FileMaker file (called “Notes”) add any fields you want in the package to that Notes table. This table should contain a PrimaryKey field and a ForeignKey field. Here’s my simple example:
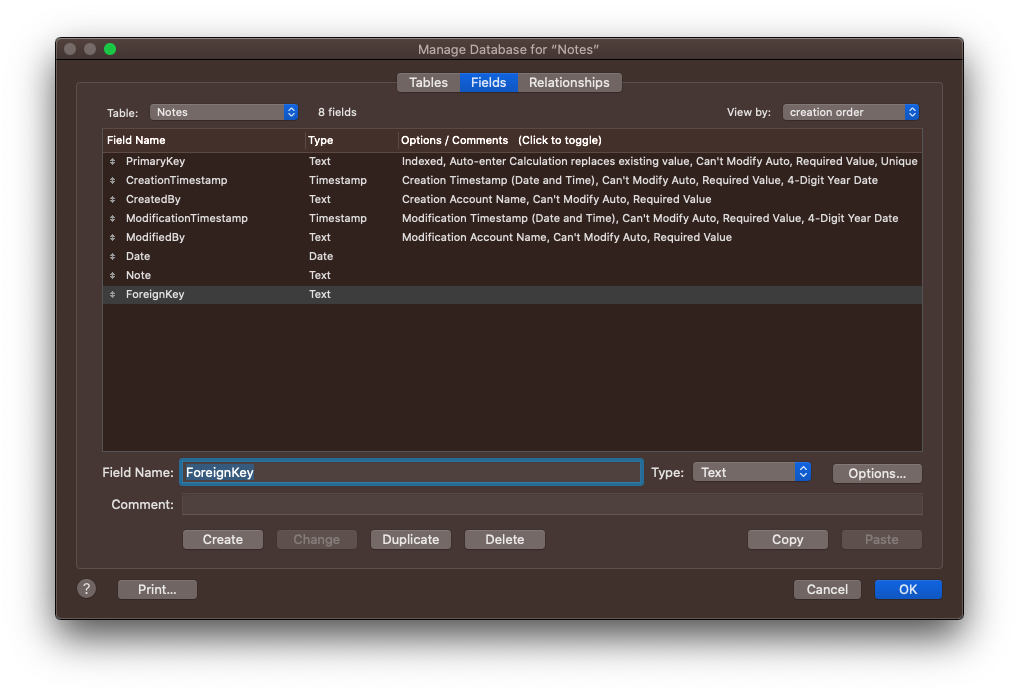
Right here we have to stop and explain something very important: the PrimaryKey field MUST be identified in the eventual XML as a primary key field. There’s no way to do this in the Manage Database UI yet. The only recourse we have is to use the defaultFields.xml setup that FileMaker uses for each new table.
Since this Notes table is going to be related to a “Projects” table occurrence, I need the foreignKey field here. Unfortunately I cannot give it a more specific name, like “ProjectKey” or something. Since this add-on is meant for many different scenarios, it’s impossible to specify the name pre-install.
Set up the Layout
The layout needs to have the __FMAddonTemplateDirectives_en name, as we learned previously.
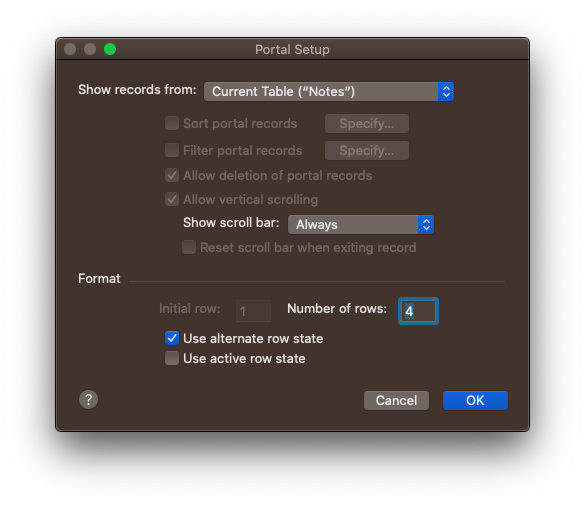
To this layout add a portal. Since the context of this layout is the Notes table occurrence, and eventually this will be a related table, use the “Current Table” option in the portal-setup dialog.
Yes, this is how we create master/detail lists, but the portal is simply showing records from the current table.
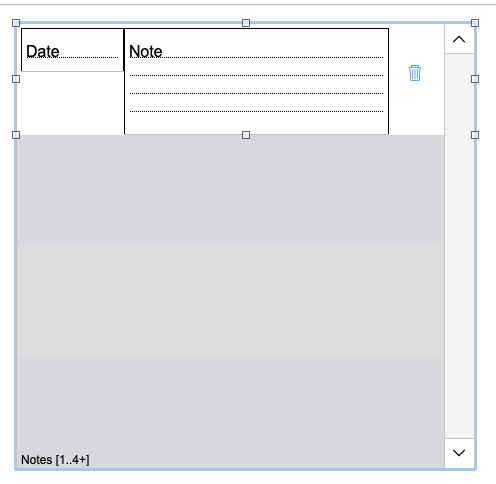
Include the relevant fields and style it how you wish.
Also include any scripts you wish such as one to delete the related record.
Include the foreign key field (and its field label) on this layout and give the object a name with the following three parts:
- A Relationship name:
R1- Your name can be anything, but it should be unique for each relationship you build.
- Separator:
| - Table Position:
RightTable
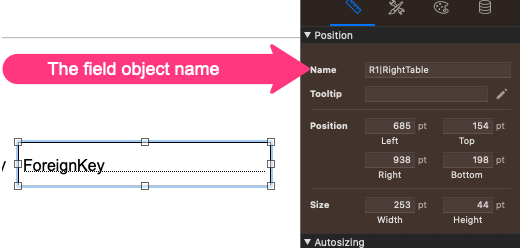
The ForeignKey object is then named, in this example: R1|RightTable
Grouping Objects
The add-on package process requires groups of objects so the XML can be generated properly. As we do in UI add-ons, we have to group certain items and leave out others. With a relationship-based add-on we have to do a bit more grouping. Here’s how to group objects:
Group the UI element–in this case, the portal–like normal. This is the element dragged onto the layout after add-on installation. By the way, you can group the single portal object by also selecting the portal fields in the grouping.
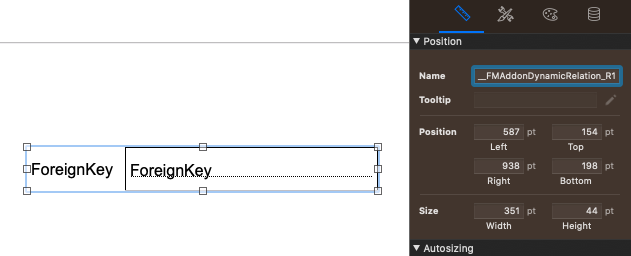
Group the foreignKey field with its field label. Name it carefully with the prefix __FMAddonDynamicRelation_. Finish the name by including the RelationshipName you gave the actual ForeignKeyField: __FMAddonDynamicRelation_R1
Yes, we’re placing a foreign key field on the ‘special’ layout. However, this object will NOT be part of the drag-on package. Its only purpose is to help the XML know which field is meant to be the ForeignKey field.
Create the Add-On
With your handy external file, create the add-on package. Quit FileMaker. Re-open. Your add-on should be available in the AddonModules folder inside the FileMaker Pro Extensions folder, and it should be ready for installation.
Here’s what the Projects file relationship graph looks like without the add-on installed:
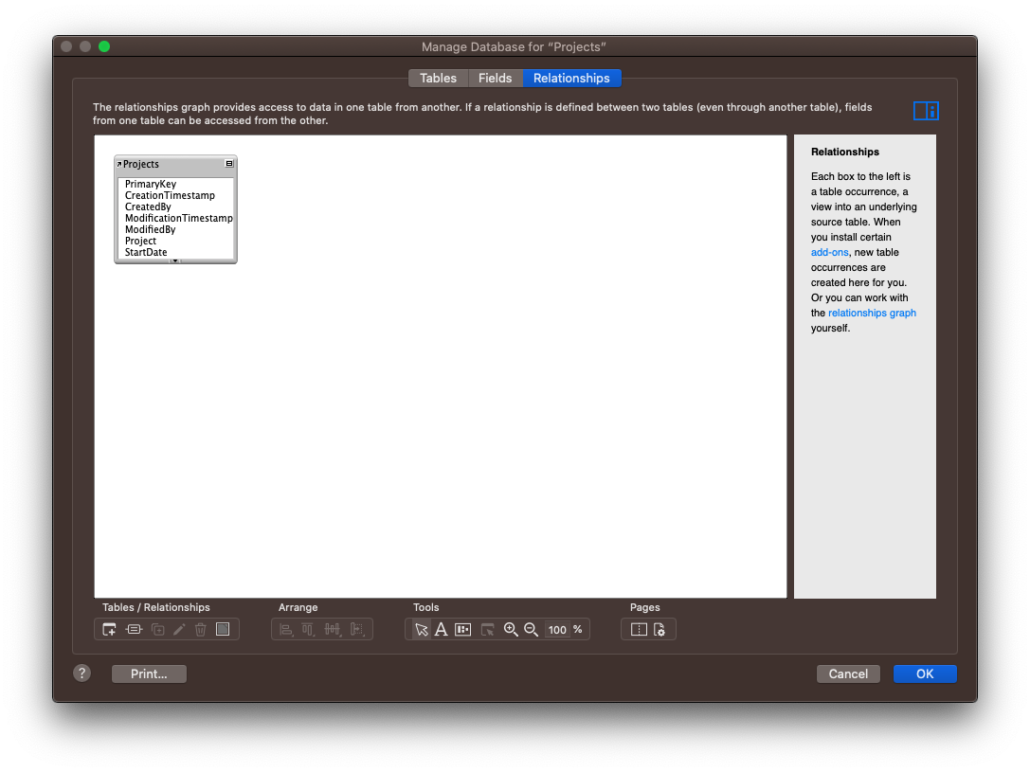
At Installation, the layouts, scripts are added to the file. Likewise the Notes table occurrence is added to the RG.
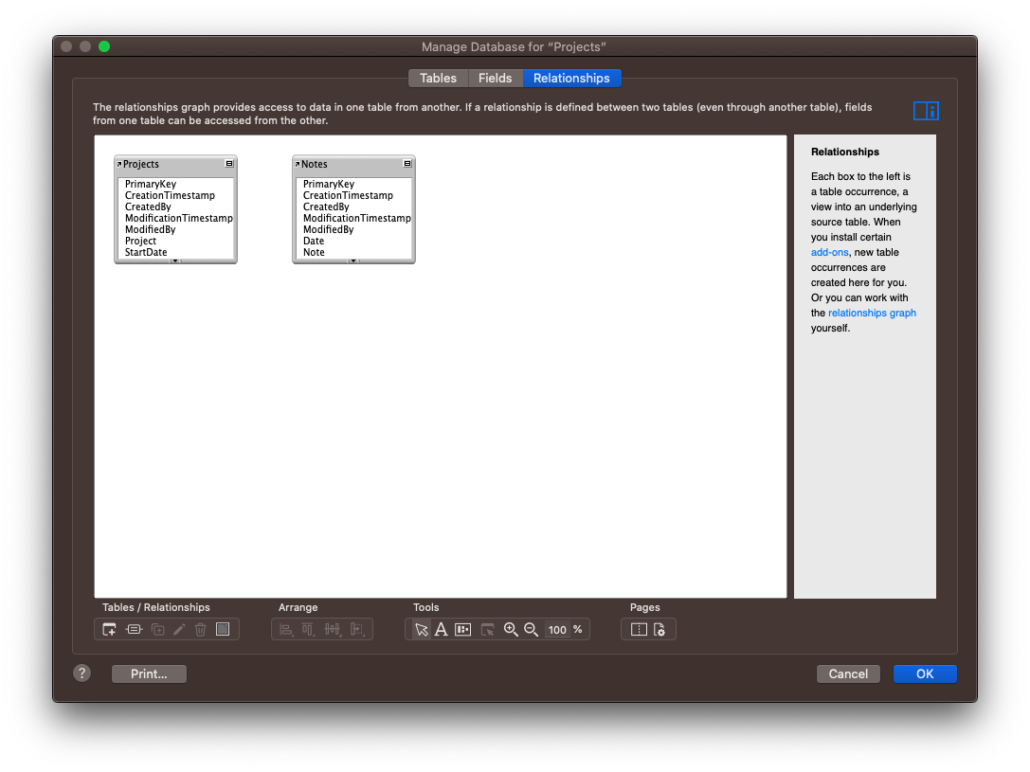
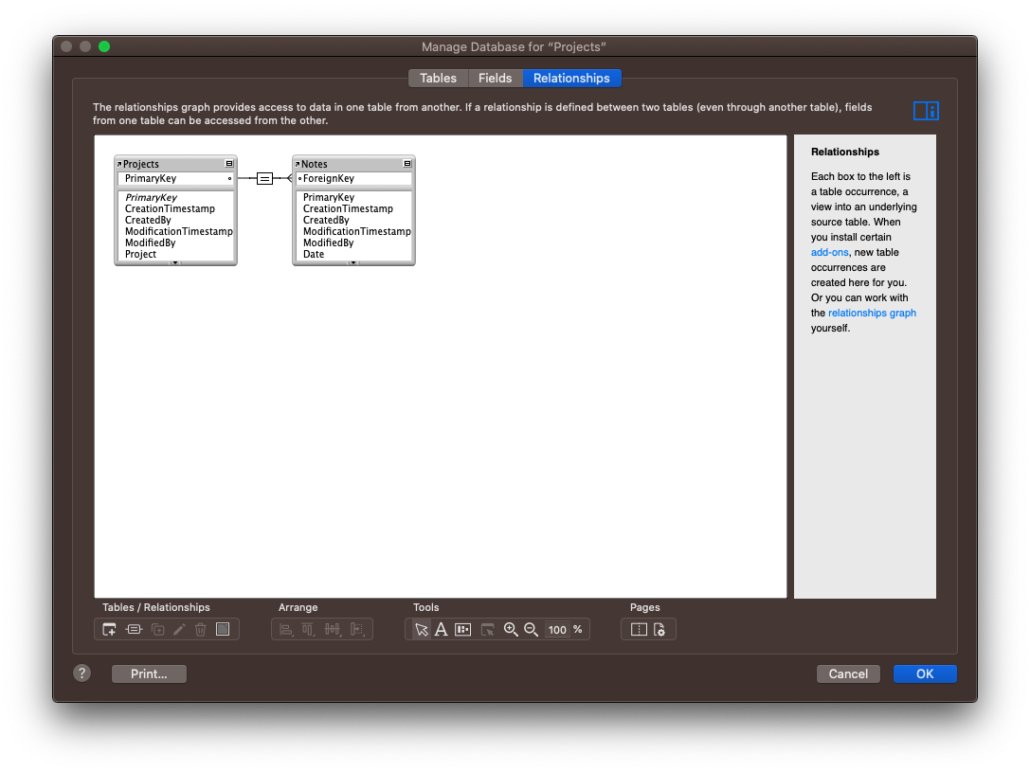
Notice there’s no relationships added as of yet. Don’t worry. Those will be added soon enough. Can you reason why the relationships have not been added? Stop and think about it for a second.
Don’t read ahead!
Seriously. Stop. Come up with the answer first.
Here’s why: During installation the package is just added to the FileMaker file. The add-on package has no ‘idea’ (yes add-ons are almost sentient) which table occurrence to attach itself to. There could be hundreds of table occurrences in an app. Like an alien in a ship, however, the add-on lies in wait ready for a table to latch onto. The latching comes not during this process but during the . . .
Applying an add-on Phase
When you drag the add-on out to a layout, the add-on picks up which table occurrence it should attach itself to. Here I dragged on the Notes add-on to a layout with the “Projects” table occurrence context.
This is what happened in the relationship graph:
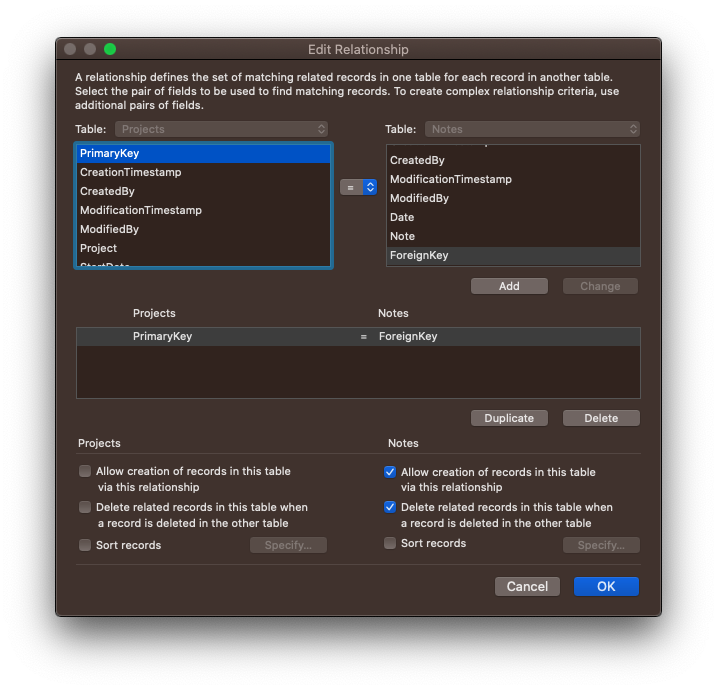
As a bonus (or not) this relationship checks the “Auto Create” and “Delete” options.
So that’s how you create add-ons with relationships, with simple relationships. There are caveats. So let me clarify those. Let’s start with this consideration:
A package is one or more tables (among other FileMaker things). As you install the add-on, the tables inside the package get added to the schema once. Even if you place the add-on many times in your file, each instance will use the exact same table.
This is key, and something to strongly consider:
When you drag an add-on to a layout, a relationship is created between the existing table occurrence and the table in the add-on. It will do this every time you drag the add-on to a layout of a different context. Observe:
I add a new table and layout called “Tasks”. The table occurrence is added to the relationship graph.
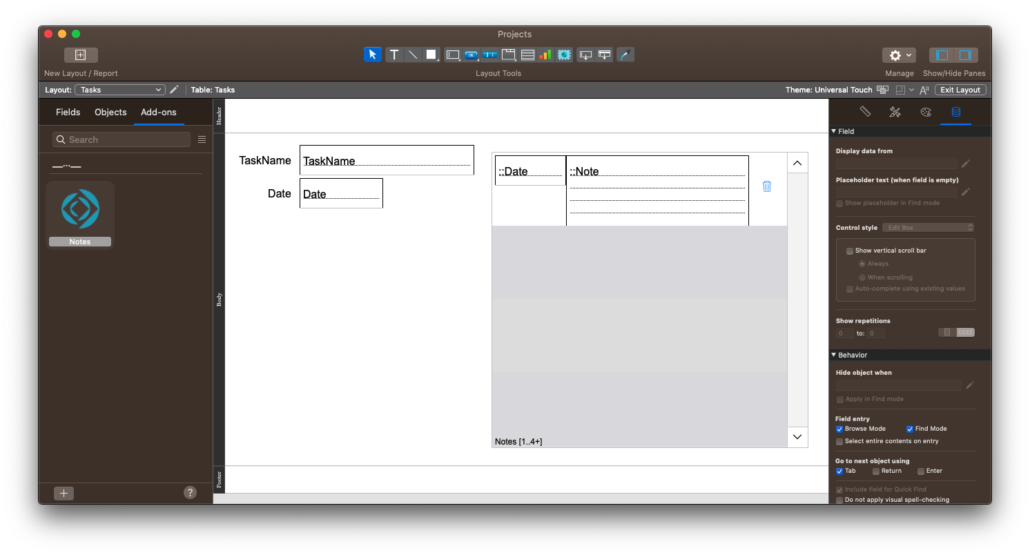
I then add the same Notes add-on to this layout.
Look what happens to the relationship graph:
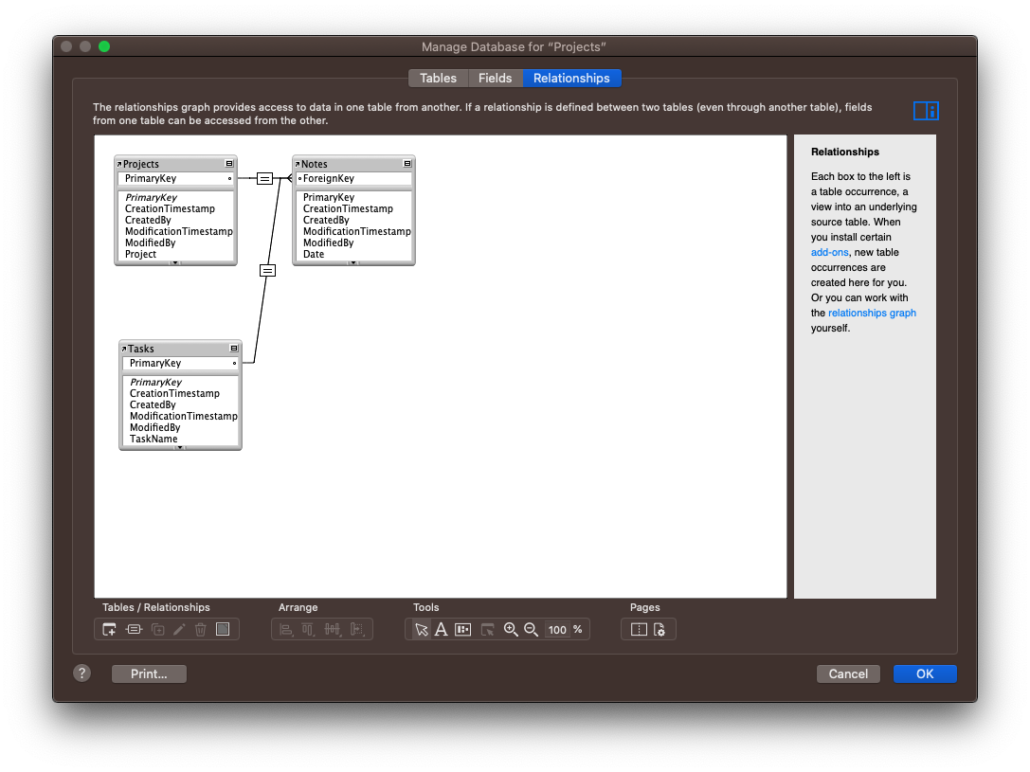
What do you see? The Tasks table is now related to the Notes table. Let’s consider a few factors:
- Tasks and Projects are related to the same Notes table occurrence.
- Tasks and Projects are now related to each other.
- Tasks and Projects use the same foreign key field in the Notes table.
What do you think? Is this an issue or not? We certainly have our opinion, but we’re interested to see what the community thinks as well. Please leave your thoughts here or in the Claris Community forums.
Onward and To Be Continued
This is a long post; let’s leave this one at this point and pick up “Join Table” type relationships in the next post.

Fantastic couple of blog posts on this great new feature. Dived head first into my first addon today by developing a COVID-19 screening questionnaire and consent form. The addon uses the same styling and naming conventions as my main FileMaker solution but within a few hours I am now able to add this great new feature for my clients in under 5 minutes. Definitely could not have done it without your blog posts so thanks for the help Jeremy.