
It’s common in Claris FileMaker to create picker windows. Imagine selecting a customer for many different parts of your app: Invoices, Work Orders, Sales Orders. How can you reuse the same customer picker and have the result from the picker target different tables?
One technique that we use here at Proof+Geist is to use the Install OnTimer script step along with a handler script.
The components are:
- Calling script, with context-dependency
- Handler script, with context-dependency
- Picker window
- Picker select script
- Global field to store selection results
To preview this technique, check out this video where I am able to use the same picker window for selecting a customer for any target context.
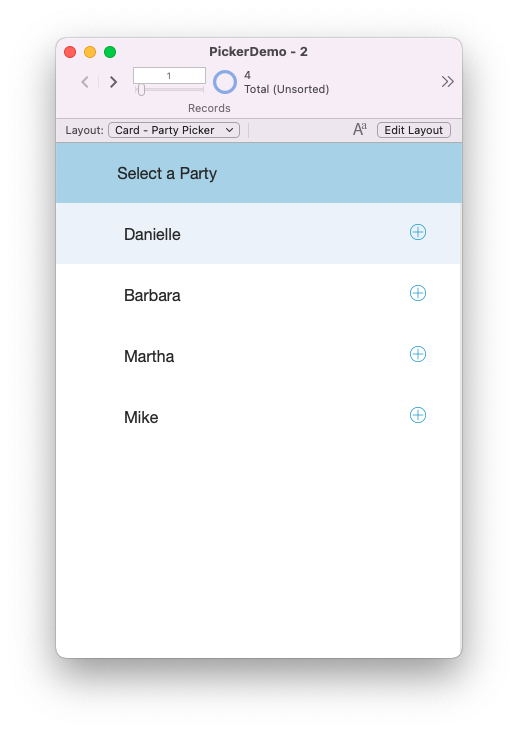
1. Create the picker
I usually start by building the picker card. Most often, I use a list view, which makes adding find capabilities or filtering more straightforward.
The scripts that support the picker include:
- Reveal the Picker, which sets up the picker environment and will:
- Create a New Window set as a Card.
- Stop any inherited OnTimers.
- Clear the global field that stores the picker result.
- Select Item, which sets the picker result in a global
- Depending on your needs, you can return one primary key, a list of keys, a JSON object, or an array of JSON objects. Most often, it’s a simple primary key of the selected record.
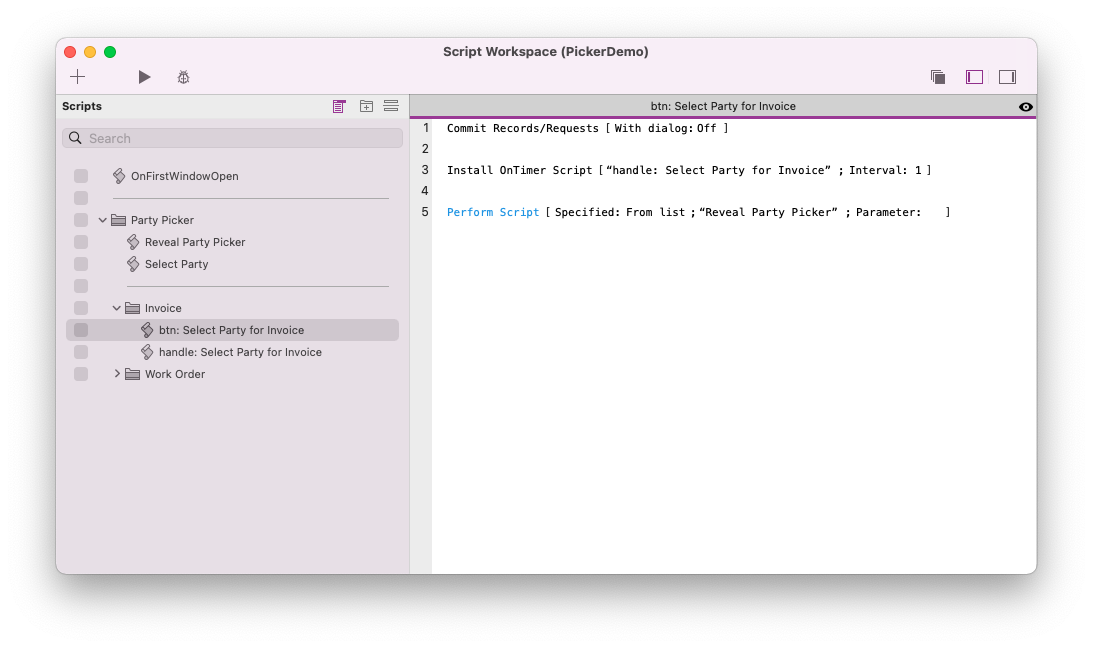
Step 2: Create the Calling “Button” Script
This script has two jobs: install the OnTimer handler and call the script that reveals the picker card.
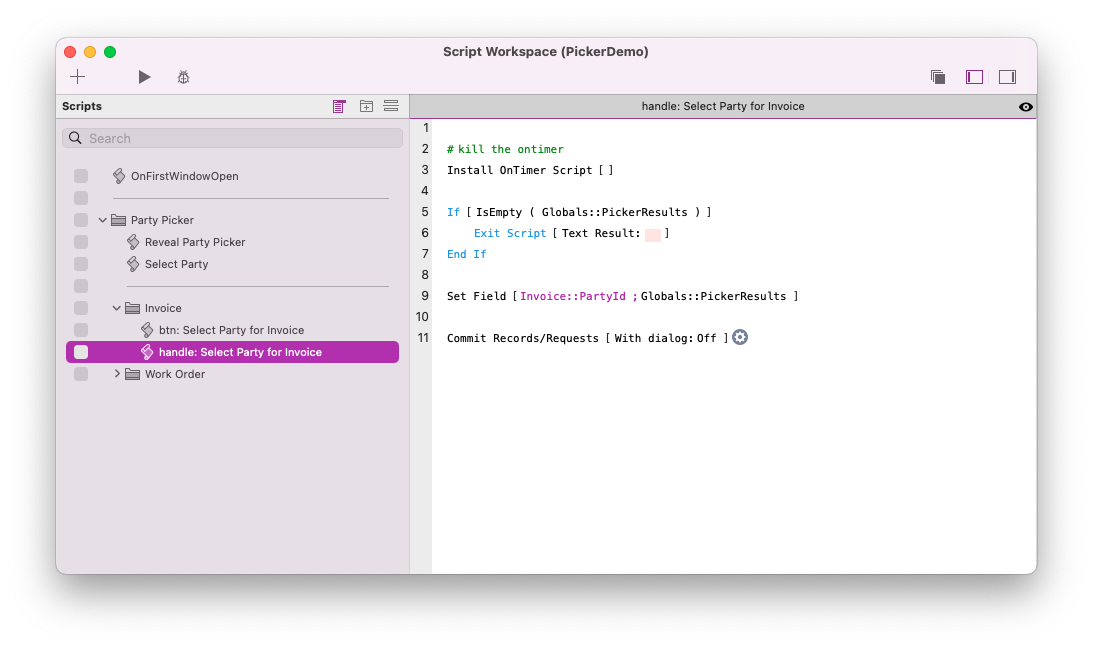
Step 3: Write the handler script
This script will run as soon as the picker window card closes. It stops the OnTimer and then processes the picker result if any. It may set the picker result into a field and commit.
Install OnTimer
This is an interesting FileMaker script step, and it’s often used in pickers to trigger a QuickFind after the user pauses typing in a Search global field. However, here we are using it to define a callback. Think of it as “here’s what I want to happen after the picker closes.” It allows us to avoid looping pauses in our picker window which would complicate the picker’s QuickFind.
In a single-file solution, a card window will inherit any OnTimer running in its parent window. Therefore, you need to stop the OnTimer in the Reveal Picker script. In a solution that separates out Picker functionality into its own file, you do not need to do that, because card windows created from a separate file do not inherit the parent OnTimer.
Taking it Up a Notch: Suggestions
The Picker
Add a global for search criteria that runs a QuickFind, add filters to constrain the find, pass into the Reveal Picker script any window dimensions, positions, default find criteria, global filter defaults.
The Selection
Allow for multiple selections, show items are selected with a button bar icon, show selected items in a popup portal based on a virtual list (ideal for long lists where the user loses track of what’s selected). Allow the user to create a new item if none are found.
The Handler
Rather than simply setting the target field directly, perhaps pass the picker result to an API that creates or edits records and includes any required validations. For example, you cannot change a customer on a posted invoice. Yes, you’d probably hide or show a disabled “Select Customer” button, but the edit Invoice API would also trap for the invoice status before it would allow the customer ID to be edited.
Conclusion
Modular pickers in FileMaker are incredibly useful – they allow you to create a picker window once and use it from any context in your FileMaker solution. I hope that this tutorial outlining the technique we use here at Proof+Geist was helpful! For questions, comments, or more information, feel free to drop us a line at info@proofgeist.com.