
Writing JavaScript in FileMaker is hard. Sure, the path is easy to see and clear to follow, but the actual writing of the code is hard. I have tried to find a way to write JS code that makes it fairly easy. And by “easy,” I mean “make it so that FileMaker developers don’t have to learn a hundred skills to get JS to work in FM – other than the JS itself.” I’m striving for a better JavaScript Development Environment.
An Okay JS Development Environment
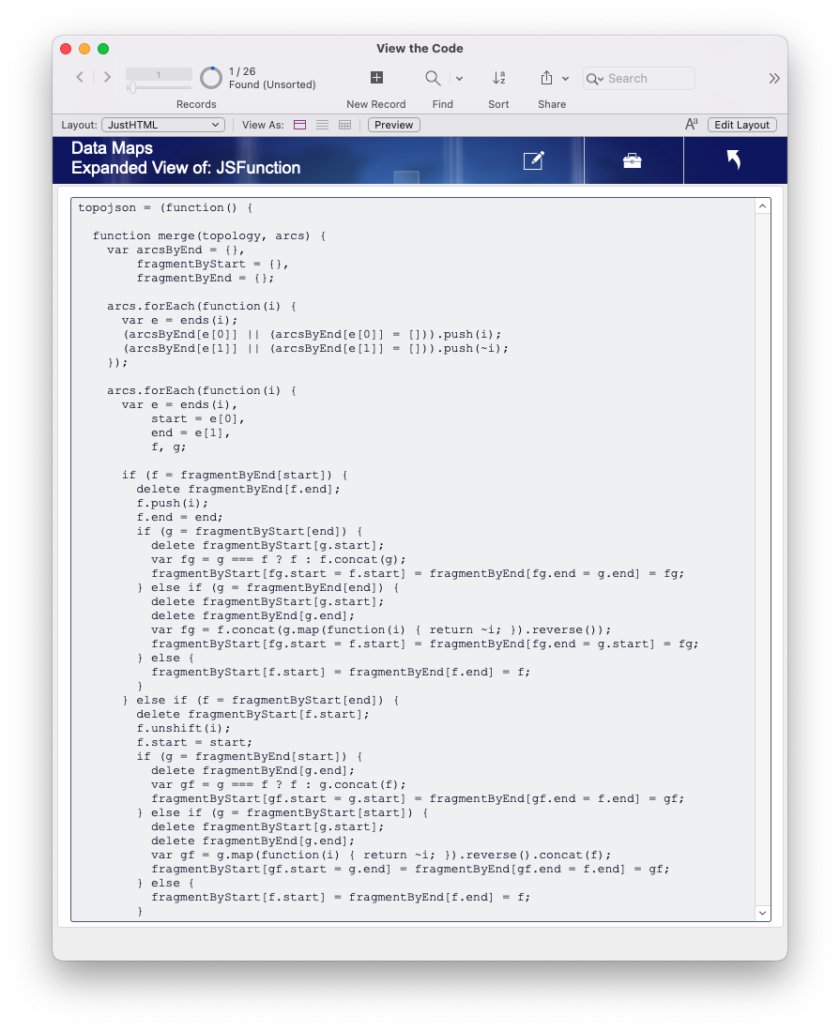
My first attempt was writing or placing code in FileMaker fields. That worked…and it didn’t. There’s a lot of advantages to this method, but there are as many disadvantages (a fact I was reminded of in session feedback comments and emails about the demos I’ve released). We’re just writing in a text field – there’s no automatic formatting of the code, and there’s not any helpful type-ahead or auto complete features. There’s a lot wrong with this. Even my attempts to use a code editor JavaScript library to render the code from a text field proved only marginally better.
I continued doing this method many times (here, here, and here) always knowing that this isn’t ideal.
But recently, Kevin Frank approached me about a JS project. Working with him on this JSON-parsing library, I took it as an opportunity to finally come up with a better way of developing JavaScript in FileMaker. Kevin has written about it in his post FileMaker 19 + JSONata. Check out the details of the origin and use. We also recorded a podcast episode about it – check that out.
Towards a Better JS Development Environment
After all of our work with JavaScript in FileMaker, we’ve come to our current definition of a better JS development environment. To be effective with our coding time, here’s what a ‘better development method’ must include:
- Using a proper HTML/JS code editor.
- Immediate rendering or performing of the code in the FileMaker web viewer object.
- Using data from the FileMaker app.
- Using the result of the JavaScript processing in FileMaker.
Let’s tackle each one of these and use my work with Kevin as illustration.
A Proper Editor
Writing JavaScript is a piece of cake when one has an integrated development environment (IDE) that catches all the mistakes and properly formats the code immediately. And my previous methods (e.g., typing into a text field) failed on both those fronts. Sure, I could use a JS code-editing library (I’ve done that). It works decently, but there’s always a catch or two that frustrated users (including me).
So this trend toward the better includes using a proper IDE to write the JS outside of a FileMaker field.
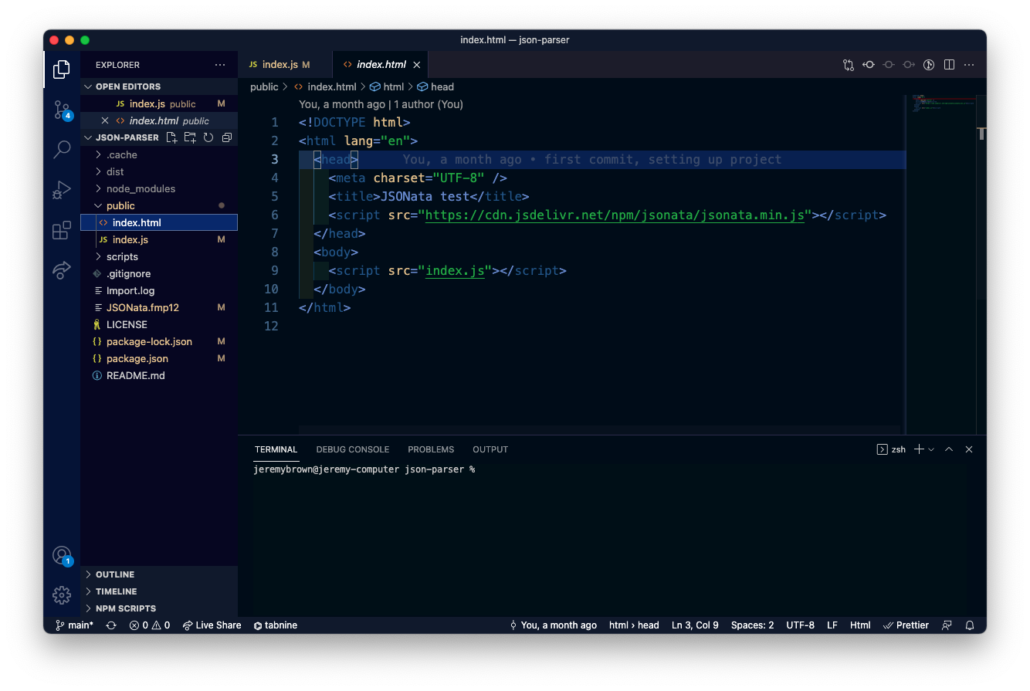
Working with a proper editor brings up a whole host of challenges; one has to actually pick a platform to use and then learn to use that platform. That takes time. I use VSCode for all my JS work now (and from that app will come screenshots). It’s complex and I don’t know all of it. But what I do know is that it makes writing JS so much easier.
With this project, I set up a small web-based file structure inside a project folder. There are two simple files in which I do all my writing: index.html and index.js. That’s manageable. I can write my simple JavaScript code here and (eventually) get it into FileMaker.
I can’t get into all that VSCode does here in this post, but if you’re going to explore writing JavaScript, VSCode is a great choice to use. I’ll share more about how to use VSCode in the near future.
See the Fruits of My Coding
The FileMaker developer is used to seeing what she is developing appear or work before her eyes – if not in scripts, at least in what’s on the layout. So too must she be able to see the code work (or not) in the web viewer right away. Additionally, since we’re using the web viewer inside FIleMaker, it’s essential to get the JS code inside FileMaker as soon as possible.
Todd figured out a way to see the JavaScript work immediately in a FileMaker file’s web viewer object. We use it in our projects here at Proof+Geist, we used the technique in the add-ons, and I’m using it for this demonstration file.
Essentially, when I am developing the JavaScript code, I can run a development server that serves the code I’m writing. This development server is picked up by the web viewer and shows the results of my JavaScript coding. Whether the code works or doesn’t, I see how my code is turning out immediately.
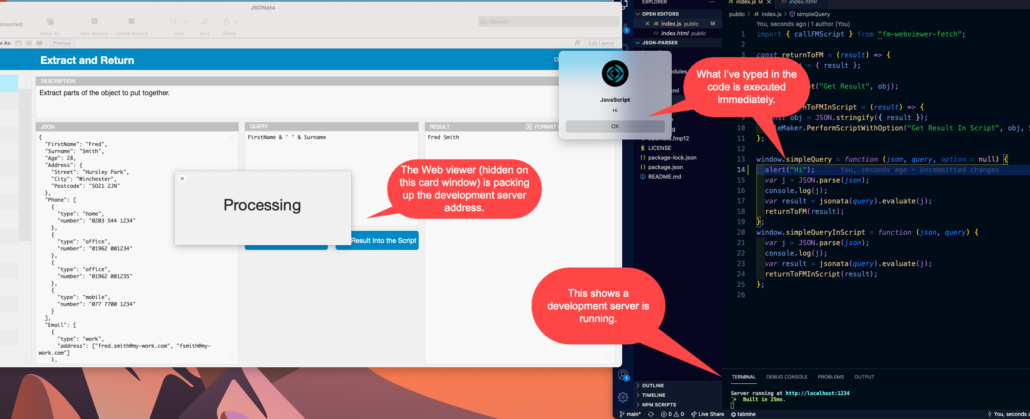
The mechanics behind this are a bit complex. It involves Node.js and some JavaScript libraries to run a development server. Hopefully, very soon, we will have a template project you can use that has all this already set up. So be on the lookout for that.
Using the web viewer inside of FileMaker to render the code is one part of a better JavaScript development environment.
Using FileMaker Data
A hallmark of a better JavaScript development environment is to use real data inside FileMaker. Since we’re working inside a FileMaker app, it follows that we could use the data already in there. I don’t want to develop with fake data that may not have the same performance considerations as the real data. If my goal is to show 1000 records in a data table, then I want to make sure the whole process works with 1000 real records.
In our development, we use data from FileMaker, and we do this using the Perform JavaScript in a Web Viewer step.
For this JSONata example, I’m using this script step to load data into the web viewer. The web viewer already contains the JS code, and the work will happen when it receives the JSON data and the query. Here’s my code.
This pattern is pretty standard:
- The web viewer on the layout is named. I write the name into a variable (line 1).
- I give the name to the global function inside the JavaScript in a variable (line 2).
- I pick up the query data in a variable (line 3).
- I pick up the JSON data in a variable (line 4).
- I then call the script step with the above pieces (line 8).
Notice that I’m pausing in line 7. In all of our work with the web viewer, we’ve found this to be essential. Since I’m using a new window (line 5) where the web viewer is located, I need to wait a small amount of time for the web viewer to load. And this has to happen so that the JS function “simpleQuery” is loaded and ready. Between Kevin and myself, we’ve tested it to be around ½ to 2 seconds.
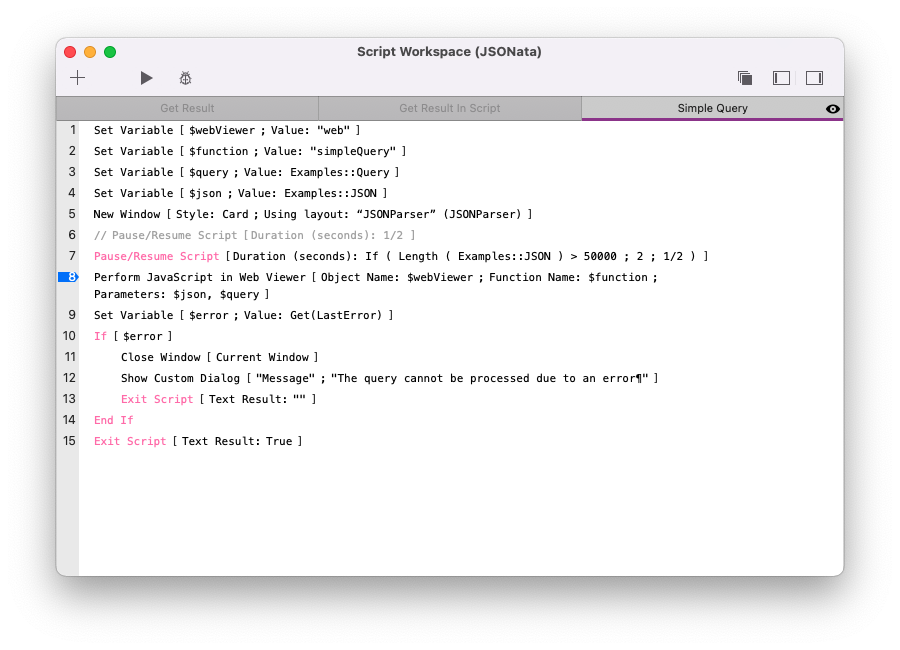
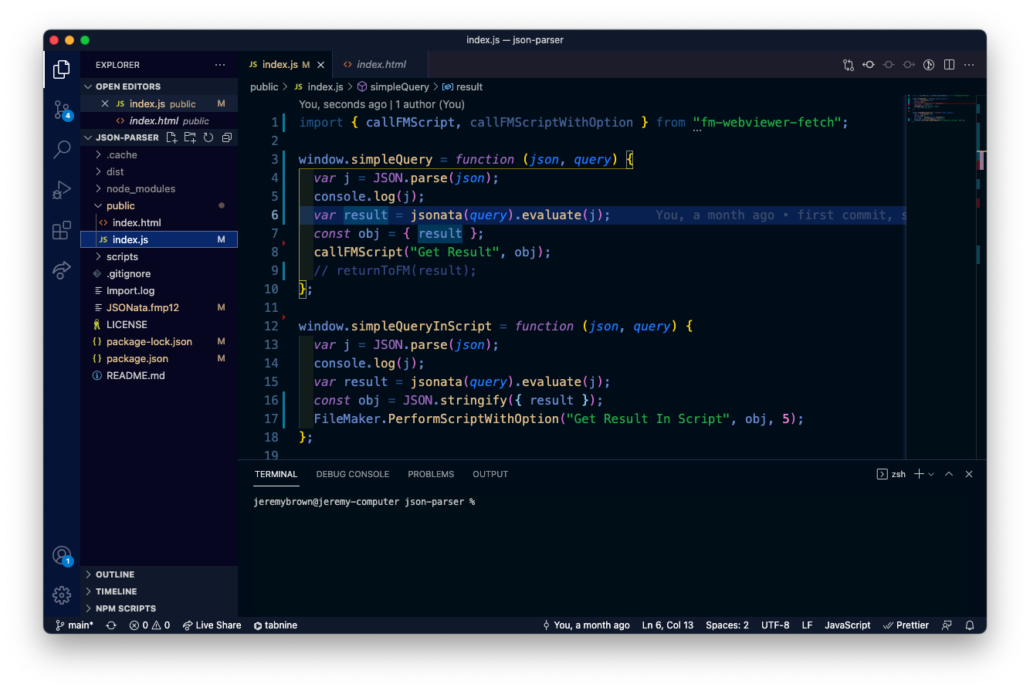
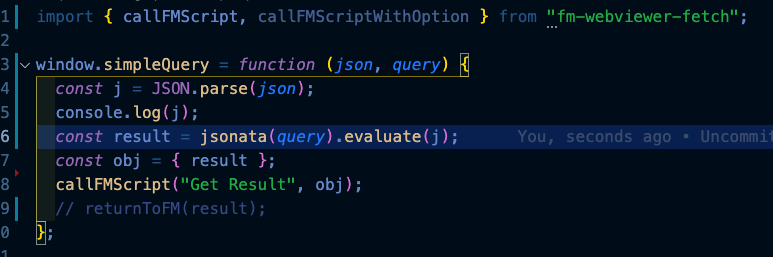
The JavaScript function itself is pretty simple, but it has one part that is vital: it has to parse the incoming JSON data into something JavaScript can read. Line 4 here shows that I’m taking the JSON that comes in and parsing it.
We have template scripts written to help us remember the pattern. I use those all the time.
Returning Results
Many times the point of a JavaScript library is to return results to FileMaker. This is the case in the work Kevin Frank and I did together. He found this cool library called JSONata that parsed JSON using a query language (one designed for this library). The idea is to pass the web viewer some JSON and a query and then get the result of the query back. So we have to work with FileMaker’s ability to get the result out.
In this example, we’re getting the results back in two ways: 1) we’re setting the data into a field, and 2) we’re getting the data back to use inside the script itself.
You can examine each script to see what they’re doing. They’re pretty simple:
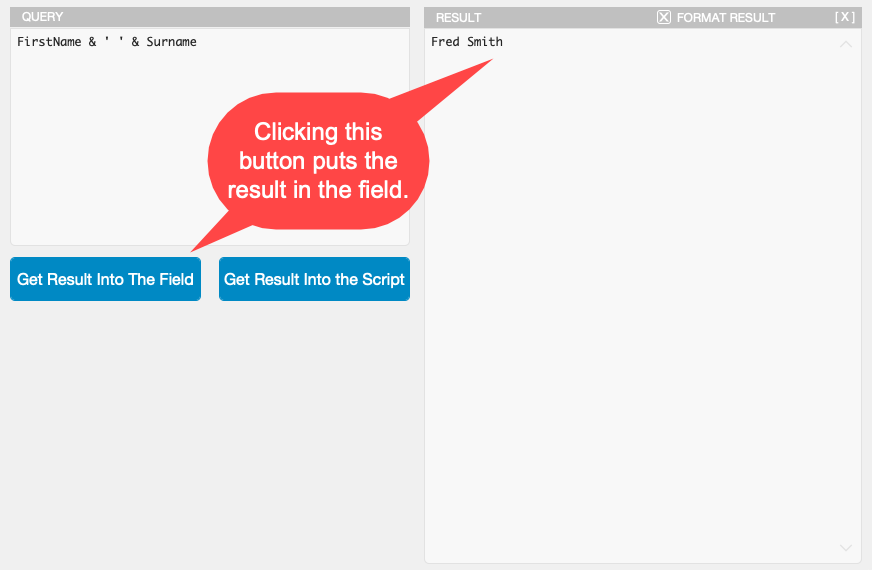
Get Result Into the Field
This script simply shows what happens in the normal use case: One script calls the JavaScript. The JavaScript does the work and calls a FileMaker script – in this case, “Get Result” to return the result back to FileMaker. The original calling script finishes its run before the “Get Result” function runs. And that’s a fine progress of steps. The callback script gets the result and places the result into a field. End scene.

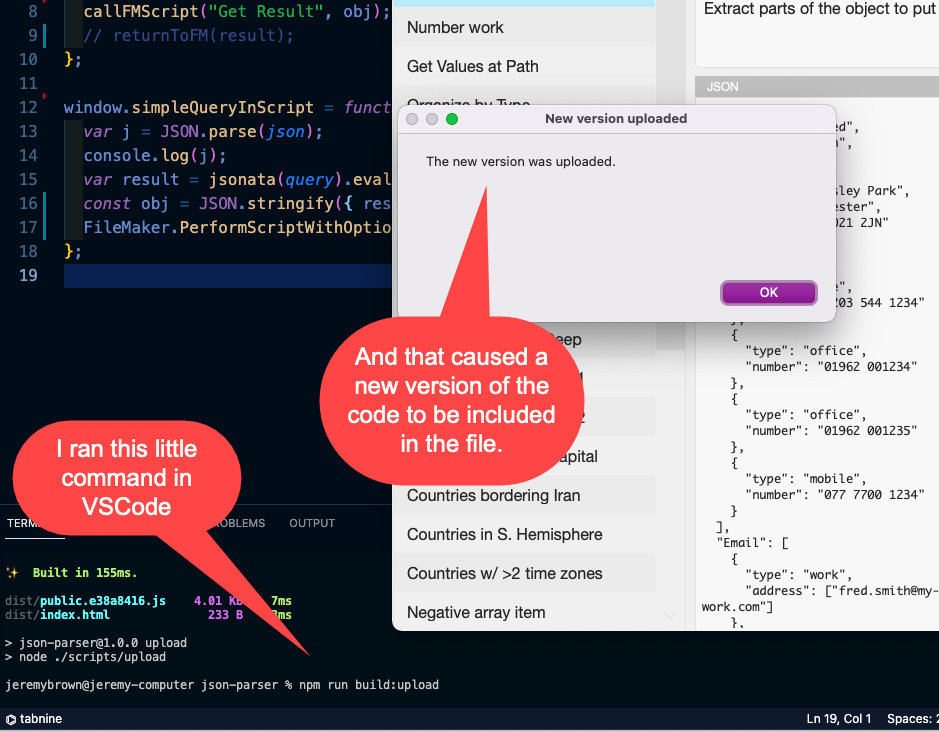
Get Result Into the Script
This script is built differently and uses the newer FileMaker.PerformScriptWithOption() function (documented here). In this case, I want to use the result in the original script. So I call this the function simpleQueryInScript(). The function processes the JSon using the query and calls back to FileMaker a script called “Get Result In Script”. This script interrupts the original script, gets the result from the JS and, in this case, sends it back to the original script.
I know this is a lot to take in, so study the scripting and examine the JS code provided here and see how it all works together.
This is a better environment for JavaScript in FileMaker development. It’s pretty close to all we can do to make it easy enough to write JS and see it render out in the web viewer while developing.
One more thing
We’ve been talking here about writing JavaScript. But there’s one more step: actually using the code you’ve written in an actual production. Don’t worry. We’ve got that covered. After I’ve finished with the code, I can run a small command and the JavaScript is put into the correct field inside of the app for the web viewer to pick up.
Onward
Finding a better JavaScript development environment for FileMaker has been something we’ve explored for many years. We’re interested in making using JavaScript even more accessible by providing easy tools to get the job done. This FileMaker 19 + JSONATA exercise gave me the opportunity to flesh out what is really necessary to easily develop the code. Thank you to Kevin Frank of FileMaker Hacks for his proposal, his collaboration, and his support.
We’re not done; in future posts, we can point out how we work with VSCode and other tools to make this work.
The demo file is found here and at Kevin’s site.